
If you’re looking to apply for a PAN-based Digital Signature Certificate (DSC) through Prodigisign, you’ve come to the right place! This step-by-step tutorial will guide you through the entire process, making it easy to complete…
![]()
If you’re looking to apply for a PAN-based Digital Signature Certificate (DSC) through Prodigisign, you’ve come to the right place! This step-by-step tutorial will guide you through the entire process, making it easy to complete…
![]()
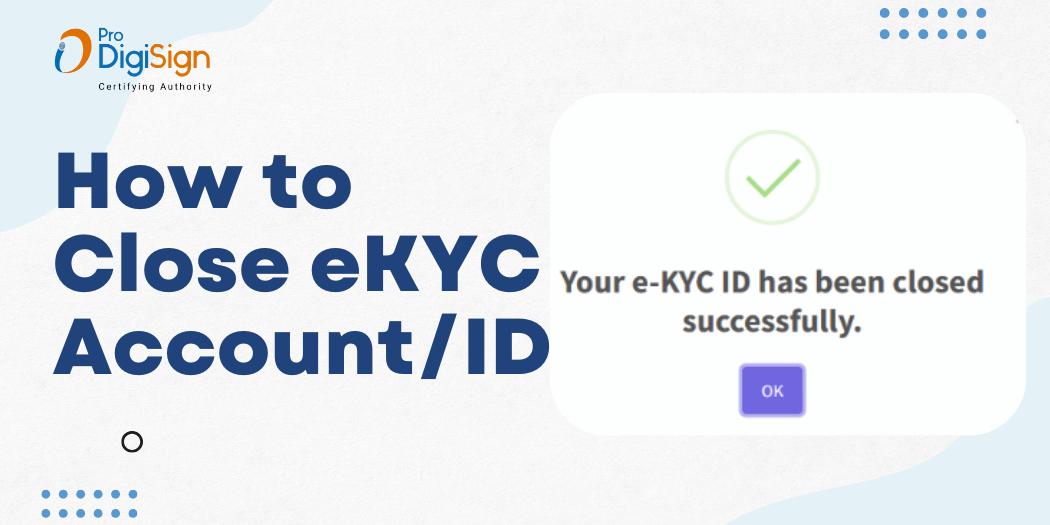
How to Close eKYC ID in Prodigisign Certifying Authority How to Close eKYC ID in Prodigisign? If you’re dealing with Digital Signature Certificates (DSC) and are facing issues related to your eKYC account in Prodigisign,…
![]()

How to do Payment and set Download Key in ProdigiSign CA. Step By Step https://apply.prodigisign.pro/EKyc/UserLogin पेज पर विजिट करने के बाद, DSC की ईमेल आईडी और मोबाइल नंबर भरें। फिर ईकेवाईसी पिन दर्ज करें। मोबाइल…
![]()
Prodigisign DSC की payment करने और DSC Download Key सेट करने के लिए आपको सबसे पहलेआपकोProdigiSign का ekyc login page https://apply.prodigisign.pro/EKyc/UserLogin पर Visit करना होगा! ध्यान रहे की Download Key set करने से पहले आपका…
![]()
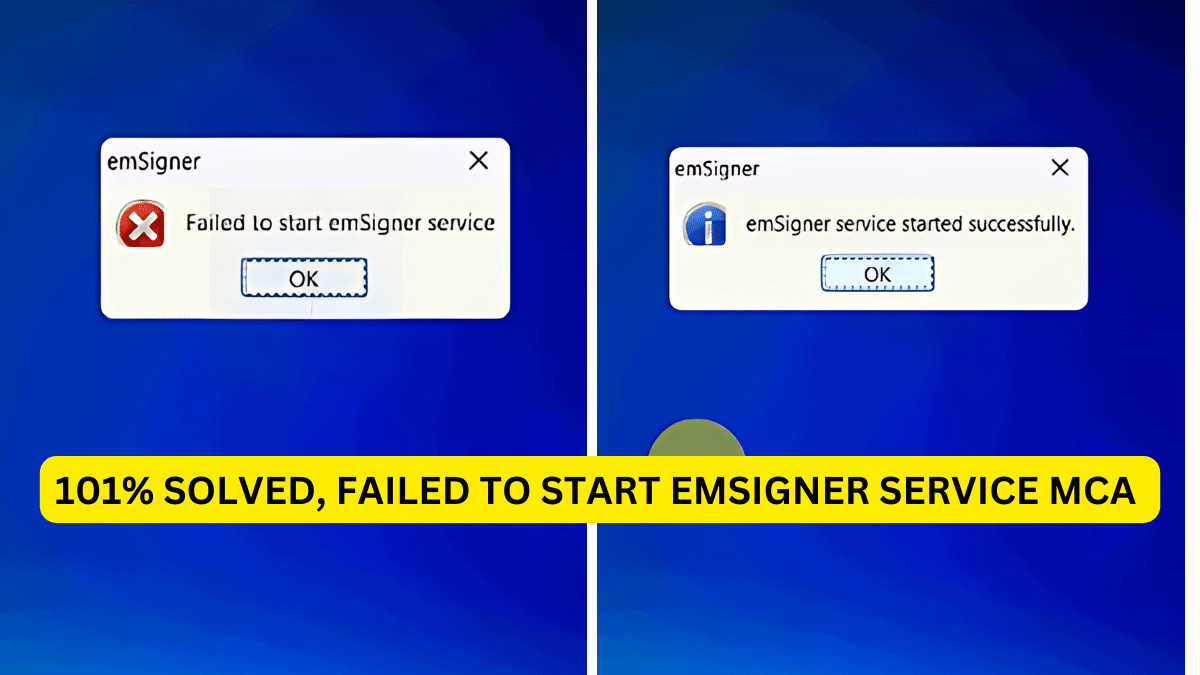
Failed To Start Emsigner Service MCA, if you work on MCA website then you must be seeing this problem Failed To Start Emsigner Service. This problem was mostly seen in Windows 11 computers. But recently…
![]()

Introduction of Epass2003 In the modern era of fast-paced digital transactions, ensuring the security and authenticity of documents is paramount. Digital signatures have emerged as a secure and efficient method to validate electronic documents. One…
![]()

It has come to our attention that ePass2003 tokens are now being introduced under a new brand name, known as “HYP2003.” This means that the same tokens we are familiar with have undergone a rebranding…
![]()